[Expand for Full Series Overview] This is Part 3 of the series, Before Your Blog Launch: From Habit Building to a Sustainable Content System.
This 4-part series is to help you build a sustainable blog while helping you navigate common self-sabotaging pitfalls that come with starting, building, and maintaining it over time.
A series dedicated to helping you use blogging as a medium to sharpen your ability to articulate your career story both to others and to yourself while fine-tuning your unique value and increasing your professional visibility over time.
At the end, you will build a sustainable blog system that works with you in mind, creating the foundation for having a visible track record of your expertise and helping you stand out in the competitive marketplace. Read the full series synopsis here.
All the Posts in this Series
Phase 1: Ease into Blogging – Build a Writing Habit that Blends in What You Love
[Previous Post] Phase 2: Before You Start Blogging – Know When to Adjust or Let Go
[Current Post] Phase 3: Plan, Write, and Design Your Blog Without Getting Stuck
Phase 4: The Art of Building a System for the Overwhelmed Blogger
This blog helps new bloggers through a common challenge when transitioning from writing for oneself to blogging for others: catering to our audience without compromising our authenticity and interests.
Because we’re not only trying to fill a need in a saturated blog market but also keep ourselves engaged to continue our blog into the future.
Post Highlights
In this blog, you’ll learn how to:
- Identify a unique market gap that aligns with your strengths and audience needs.
- Use your content plan as a benchmark, growth tracker, and foundation for branding and website development.
- Batch tasks to save time and maintain consistency across content, design, and messaging.
- Write website copy responsibly with artificial intelligence (AI) to preserve your voice.
- Share stories that balance emotional connection with intentional privacy.
- Design your website and choose tools that reflect your vision without breaking the budget.
This post builds on a previous post that helps new bloggers set a realistic approach that aligns with their current circumstances and intrinsic goals before going all in on blogging. It includes a few references to that piece, but it stands fully on its own. You don’t need to read the earlier post to get the full value.
By writing regularly and reflecting on the long-term value of the blog, you’re no longer starting from scratch.
You have real content, drafts, topic ideas, and notes on direction and intent that are ready to be shaped.
We’re now entering the stage most people associate with starting a blog: the visible setup and design process, often supported by an abundance of online resources and tutorials.
→ Expert-Level Technical Resources That Helped Me
Sources I Use to Learn Practical, Beginner-Friendly Execution (Blogging, Copywriting & Real-World SEO)
- The Side Blogger — Creator-focused articles on blogging, newsletters, and audience monetization from Maliha, known for practical strategies on turning content into sustainable online income.
- Jacob McMillen — Conversion-focused copywriting and SEO-driven content strategy insights for freelancers and B2B growth.
- Orbit Media Studios Blog—Experiment-based insights on web optimization, UX, and content strategy backed by real case studies and testing.
Sources I Use to Understand Scalable Marketing Systems & Growth Strategy (SEO, Content & Inbound at Industry Level)
- Copyblogger — One of the most influential authority sites in content marketing and copywriting, known for pioneering modern content-driven business and SEO education since 2006.
- Backlinko — A knowledge-to-execution hub for SEO, marketing, and AI strategies, tools, and templates, backed by one of the industry’s leading SEO platforms, Semrush.
- HubSpot Blog — Industry-leading resource for inbound marketing, SEO, and content strategy straight from the most widely used CRM and marketing platform.
Sources I Use for Advanced Research, UX Strategy & Industry Thought Leadership
- Nielsen Norman Group — Industry-leading research, articles, and gold standards on UX writing, usability, content design, and user experience strategy from one of the pioneering authorities in UX research and design.
However, this guide isn’t here to be just another piece of how-to content.
Instead, it aims to shed light on the often overlooked pitfalls of human nature—perfectionism, analysis paralysis, and creative stagnation—that can quietly surface at every stage of the process.
Up until now, your writing has been a space to explore, reflect, and uncover your thoughts freely.
But this phase marks a shift: turning that private process into something public.
Something others can see, feel, and connect with.
You’re giving your words “form” through layout, color, imagery, and motion so that your message becomes an experience.
An experience that can be stumbled upon by someone who may not understand things the way you do, but who might feel something in your perspective.
Making your writing more tangible isn’t just about visibility. It’s about expanding its ability to resonate, to reach beyond you, and touch others in meaningful, unexpected ways.
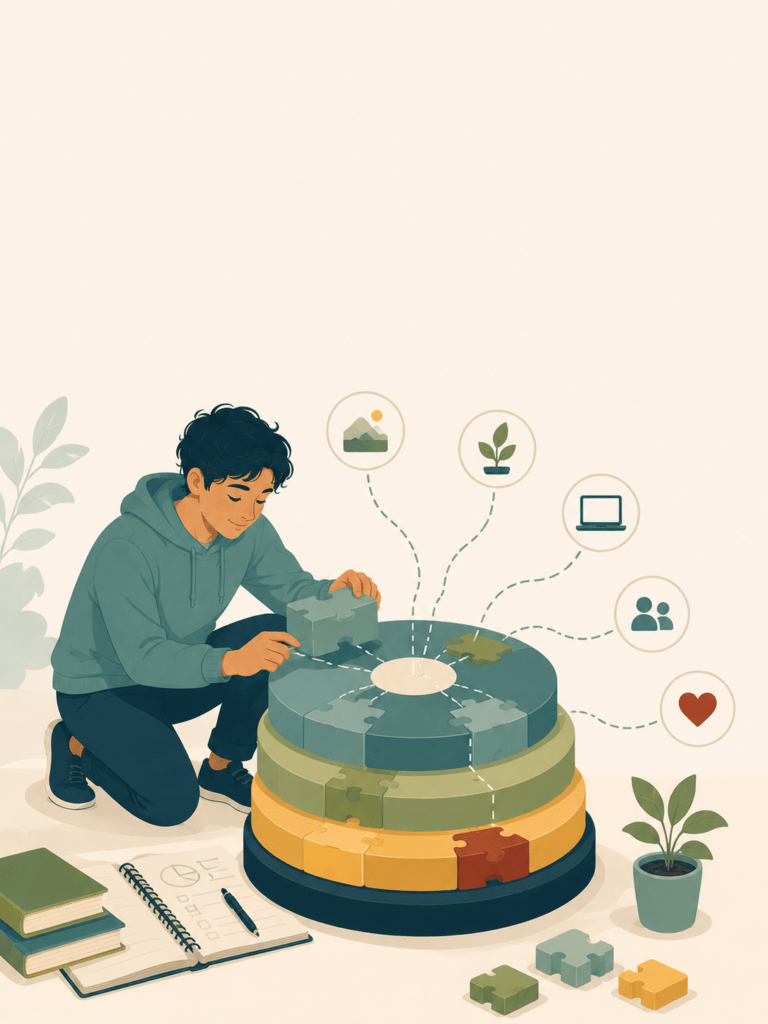
This phase challenges us to shape our writing into a structure that serves others without compromising our voice. As you move along this phase, you will also be naturally guided into delivering the following.
- Content plan,
- Web copy,
- Web structure,
- Brand identity, and
- Asset safekeeping
These deliverables will clarify our workload and blogging standards, which set the groundwork for building tailored systems in the next phase to increase our speed, efficiency, and focus.
Step 4: Set up a content plan that puts you into the content planning process.
First, let’s get the technicals out of the way.
- Consolidate Existing Content: Gather all drafts, notes, topic ideas, and reflections you’ve created so far into one organized workspace.
- Outside Research: Know how your blog brings additional value to your audience by
- doing market analysis (i.e., existing bloggers in your field, AI disruptions, etc.)
- social listening (i.e., using Quora, YouTube, comment sections, etc. to understand public interests/trends and market gaps), and
- understanding the general workflow on content planning, creation, publishing, marketing, and management (i.e., industry gold standards, beginner blogging steps and examples, blog publish/frequency statistics, etc.).
→ Below are several resources that offer different perspectives on content planning and how it can be structured and executed.
From Nielsen Norman Group:
- Defines how content strategy is planned, governed, and structured across UX systems (useful for understanding planning frameworks and lifecycle thinking)
- Explains how UX strategy translates into structured plans, roadmaps, and measurable outcomes (useful for system-level content decisions)
From Orbit Media Studios:
From Copyblogger:
From Backlinko:
From HubSpot:
→ With the supporting context in mind, this post will introduce its own definition and multi-functional framework designed specifically for beginners starting from zero.
The purpose of a content plan or any plan is to make sure we can focus and do the right things under specified, measurable expectations and standards within a reasonable timeframe.
A content plan
- can get these specifics out of the way and reserve our energy to think and write,
- be used as a reference/checklist before advancing to the next step,
- be used to pre-plan for the next set of objectives, and
- serve as a reminder/motivation on the importance of current tasks/upcoming deadlines.
The problem is: How can we accurately plan for something that we don’t have prior knowledge of doing?
The short answer is: We don’t.
Our first-ever content plan could quickly turn into an overly complicated, perfectionistic blueprint based on everything we’ve researched online, rather than a practical, actionable plan we can easily implement from day one.
We need to change the expectations we should have when writing out the first iteration of our content plan.
Your content plan isn’t set in stone. It will become more accurate the more you get familiar with the blogging process and how you work.
Here’s what we should expect our content plan to be, at least in this stage:
- Expect to be the most theoretical, but the least actionable.
- Expect it to be a compilation of the industry’s best practices, but not beginner-friendly.
Keep this idealized plan to remind yourself of the level at which a top-tier blog operates, and use it to
- map out all foreseeable steps of the blogging workflow
- work our way in reverse to remove or break down big steps into smaller steps that we can comfortably act on with our current skills, time, energy, and resources.
The goal of the first content plan is simply to create direction. It’s through taking action, learning by trial and error, and making adjustments along the way that we shape a truly actionable plan that better fits our reality.
This approach also emphasizes the importance of factoring yourself into a plan, helping you take action from where you are right now and evolve as your skills, knowledge, and blog grow.
As you research more into what you should do for a blog, the more important it is to keep yourself in the equation.
Such as balancing these three areas when planning content:
- Freeflow Thoughts vs. Structured Writing: Translating raw thoughts accurately into words and formatting them according to the rules of copywriting, SEO, and webpage UI without eating away at our blog personality requires time to find the right compromise.
- Self-Expression vs. Audience Connection: Choosing to write on topics that keep both you and your target audience engaged, and making the conscious effort to create content that’s helpful for an audience who don’t know you and are encountering your ideas for the first time.
- Perfectionism vs. Timely Actions: Forcing yourself to start actualizing after a set amount of readings and instructions on the technical know-how while navigating the emotional and creative challenges above.
Step 4 Deliverables:
- Create a Content Plan: a document that defines your blog’s purpose, value, target audience, and content guidelines—covering creation, publishing, marketing, and monetization strategies that are aligned with clear standards and success metrics.
Useful Byproducts to Create From the Content Planning Process
- Process Workflow Map: a mind map that streamlines and condenses the content plan into clear, actionable steps, highlighting relationships among tasks (e.g., dependencies, prerequisites, and deliverables).
- Blog Process Gantt Chart: a sequence of blogging process steps required to create the deliverables of each blog post, with a very rough estimate (based on similar past experiences, your soft launch phase, etc, as a starting baseline) of the time it will take to complete each task.
Step 5: Write a compelling web copy that highlights what your blog is about, its unique edge, your reason for creating it, and what your audience will gain.
- Create a Website Flowchart: Draft a simple outline of your blog website, including key pages such as Homepage, About page, Blog Posts, and Contact page.
- Clarify Core Themes and Purpose: Identify the central topics, tone, purpose, and value proposition behind your blog.
- Write Web Copy: Align your blog’s themes/purpose in step 2 to your audience’s needs and intent across each webpage outlined in your website flowchart in step 1.
Here is one productivity tip that can significantly reduce time spent on organization and summarization, helping you move into high-priority tasks faster.
Productivity Tip #1: Task Batching
This starts with looking a few steps ahead.
Batch your tasks that require the same resources.
If your current and next steps rely on the same sources, it can make sense to handle both while you’re already engaged with those materials (as long as it feels like a natural extension of the work rather than a distraction).
Example:
In our case,
- Clarify core themes and purpose in this step, and
- Name your blog in the next step.
Both will benefit from the review of the same set of drafts and notes.
- Identify recurring keywords in your writing that signal a strong common theme for the blog
- Highlight “winning” phrases within your notes to be reused to create a compelling value proposition or hero section hook.
- Jot down any imagery that comes to mind after interconnecting all your writing that may bring inspiration for you to create a one-of-a-kind logo.
All of which are suggestions to give you a head start on naming your blog later on.
→ Below are several helpful resources that will help you write your web copy.
- From Copyblogger:
From Jacob McMillen:
From HubSpot:
Here are two productivity tips that can significantly reduce writer’s block when creating website copy, helping you move into high-priority writing faster.
Productivity Tip #2: Using AI Without Losing Authenticity
To prevent our perfectionist tendencies from flaring up because it’s hard to translate our thoughts into words accurately, it’s helpful to use AI to help us fine-tune the accuracy of our meaning into words and refine the final wording with our voice.
Here’s how we can use AI without losing our authenticity,
- Jot down your thoughts, no matter the length.
- Try to reword it for the sake of length, accuracy, or other reasons, if needed, for about 2-3 tries to train your thoughts-to-words fluency.
- Use AI (ChatGPT, Gemini, or DeepSeek) to either refine or explain the meaning/underlying reason you wish to convey.
- Combine your authentic thoughts in Step 1 and AI clarity from Step 3.
- Add additional touches of your brand’s personality—through tone, language, or visual cues—to make your content feel distinctively, you.
If you find yourself unsure or needing to clarify a thought while translating it into words, that’s a sign your audience might feel the same. Take a moment to add a line to facilitate understanding, so they arrive at the same meaning as you.
Productivity Tip #3: Create a Balance Between Authentic Storytelling and Protecting Your Privacy
If you tend to incorporate personal stories or emotional reflections in your blog, your key insights or helpful takeaways can sometimes get lost in the waves of emotional floodgates.
The key is to acknowledge your emotions and use this influx of emotions to your advantage.
Ironically, the thoughts that you may think are too personal or run-on could be great entry points to help you pinpoint more solutions and helpful advice for your audience. It comes from the heart.
Here’s how,
- Write your raw thoughts down.
- Save it in a secure file like a confidential diary.
- Leave it for a day or whenever you’re ready to physically distance yourself from those raw emotions. This helps you come back to review it with a fresh mind.
- Highlight your key ideas and standout phrases, while thoughtfully reshaping or softening personal details you’d rather not share outright, striking a balance between authenticity and intentional privacy.
Step 5 Deliverables:
- Website Outline: a diagram that shows how each webpage is interlinked with another, with a brief text description and the purpose of each webpage.
- Low-Fidelity Wireframe: a rough sketch of how each webpage will flow from one page to the next, using basic shapes to represent UI elements and placeholders for text and images.
- Web Copy: all the written content on each webpage you choose to include on your website.
Useful Byproducts to Create From the Website Architecture and Copywriting Process
- List of Potential Blog Names and Logo Ideas (more in next step): After reading and organizing your writing and thoughts, label/mark keywords that help you create a name and logo that will stay true to your blog.
Step 6: Give your blog a name and use visuals to bring your words to life
- Develop a Brand Identity: Create a layout, color scheme, fonts, and style that reflect the personality and message of your content.
- Name Your Blog: Brainstorm and finalize a name that encapsulates the blog’s essence by using the list of potential blog names from Step 4 as a starting point.
- Design or choose a Logo: Create or choose visual branding elements by using the list of logo ideas from Step 4 as a starting point.
→ Below are several helpful resources that will help you design your brand identity.
From Nulab:
From Elementor:
From Tailor Brands:
Process Principle #1: Audience-Led Design as an Extension of Copywriting, Not Pure Aesthetics
The website design process should not be treated as a separate creative layer focused solely on visuals, but as a direct extension of your copy and the message you are trying to communicate.
Every design decision in layout, spacing, typography, color, and structure should exist to reinforce clarity, guide attention, and support how your audience understands and moves through your content.
When you use design as a functional tool and your copywriting as a guide, you create a practical constraint you can build around, preventing unfocused imaginative energy from pulling the process away from your blog’s main purpose.
Process Principle #2: Tool Awareness as Creative Constraint for Actionable Website Execution
When we’re just starting, it’s easy to blur the line between what’s truly necessary and the extra frills.
The allure of polished, successful blogs can make us feel like we need them all from day one. Combine that with clever marketing and the pressure of wearing multiple hats as a solo creator, and it’s no surprise we’re tempted to spend on premium tools for the sake of convenience and perfection.
But often, these expenses do more to slim our wallets than support our growth.
While you’re going deeper into what your website design actually requires, you naturally begin to identify the tools and features needed to bring it to life. Knowing what tools you use helps to turn it into another practical constraint that shapes and focuses your design vision.
Here’s how:
- Read articles to identify tools that are an absolute necessity for a beginner blogger (i.e., blogging platform, tools for writing, publishing, and tracking performance).
- While reading, be sure to jot down the mentioned tools/names and their prices on a list to probe further in the future. Don’t wander off to learn about each tool; just have an idea of the tool categories and the rough price range that you will need to purchase.
- Create a budget range for each category of tools based on pricing data collected in Step 1.
- Reference your wireframes and differentiate your needs from your wants so you can adjust your tool list based on your established budget.
- Use a Weighted Decision Matrix to finalize your list of tools based on important criteria such as features, pricing/budget, learning easability, user reviews, frequency of updates, community support, etc.
| Weighted Decision Matrix: A weighted decision matrix is a decision-making tool that helps to compare multiple options against a set of criteria, with each criterion weighted by a relative importance ratio. The tool with the highest overall score is the best choice. → Guide: Create a Weighted Decision Matrix |
Step 6 Deliverables:
- Finalized Brand Identity Kit: a collection of your blog’s font styles, font sizes, colors (primary, secondary, highlight, hyperlink, text), logo designs, and other brand personality elements.
- Brand Asset Library: a place for you to save all your iterations of web copies, designs, images, animations, photographs, brand identity kits, and wireframes that will be used in your blog website, so you can retrieve and revert easily.
- Medium Fidelity Wireframe: Using your blog outline or low-fidelity wireframe as the base, add detailed UI elements, map out UI interactions, and organize visual elements/text with the completed copywriting.
Useful Byproducts to Create From the Branding and Website Design Process
- List of Tools Required: Create a list of tools, plugins, templates, etc., needed to make your wireframe come to life. See below for a tip to help you create a realistic list that balances your budget with your needs.
Conclusion
This marks the first phase where we began to recognize the power of turning solutions born from personal struggles into something empowering.
Tasks like creating content plans, writing web copy, designing a website, or crafting a brand logo no longer feel overly professional or out of reach. They spark momentum, creating a domino effect of cascading value that connects past effort to future steps.
But as the path becomes clearer, so does the growing list of tasks. What you’ve done in this phase is only a fraction of the total workload for starting and maintaining your blog.
Will you still have time to write while also being able to live fully?
With this in mind, we move to the Final Phase of our Pre-Launch Blog series:
“Phase 4: The Art of Building a System for the Overwhelmed Blogger”
Here, we will turn everything you’ve done in this series into a personalized system that helps you stay focused on writing quality content without being bogged down by backend tasks, life changes, and personal responsibilities.
Kind Note: There are multiple paths to be successful, a myriad of ways to start and maintain a blog that will last as long as you want. This series offers one path, not the path. Use it as part of your solution, all of it, or none at all. While our struggles often overlap, your inclinations and circumstances are uniquely yours. This series exists not to contort you within a fixed set of instructions but to anchor you as the origin point of solutions that truly fit your life.
Expand the links below to see where this journey leads next.
🔗 Explore the full series roadmap here
[Expand to View] Before Your Blog Launch: From Habit Building to a Sustainable Content System.
All the Posts in this Series
Phase 1: Ease into Blogging – Build a Writing Habit that Blends in What You Love
[Previous Post] Phase 2: Before You Start Blogging – Know When to Adjust or Let Go
[This Post] Phase 3: Plan, Write, and Design Your Blog Without Getting Stuck
[Next Recommended Post] Phase 4: The Art of Building a System for the Overwhelmed Blogger